Saturday, December 14, 2013

Gluten-free Dairy-free Eggnog Pancakes


When I wrote my book, I wanted to be able to add variations and more information about the recipes. That is what this blog is all about!

This morning, I was craving some pancakes. I had Rice Dream eggnog in the fridge and decided to use that instead of my regular almond milk in the recipe. I do miss things like eggnog but unfortunately all of that dairy would not make my tummy or throat happy (since being dairy-free, all of the mucous in my throat has disappeared and I'm not getting any sinus infections).

So here's how I did it. First, turn to page 33. Excellent. Follow the directions for the dry ingredients except the cinnamon which will need to be adjusted. Add only 1/4 teaspoon of cinnamon and then add 1/4 teaspoon of ground nutmeg; this gives the pancake a very nice flavor.

The pancake recipe calls for 1 1/2 cups of milk or milk substitute (I didn't bother making the buttermilk today). If you use regular eggnog, use 1 cup of eggnog and 1/2 cup of milk. You may need to add more milk to thin out the batter if it's too thick.

If you use the Rice Dream eggnog or any other dairy-free substitute, I would suggest adding extra fat; rice milk in particular is very thin. I measured just under 1 1/2 cups of the rice milk (somewhere between the 1 1/4 cup and 1 1/2 cup mark) and then added enough vegetable oil to measure 1 1/2 cups. Perfect.

Since eggnog is usually sweet, you can cut back the sugar to only 1 tablespoon. Since this was a special treat, I used the regular amount. It was not too sweet. Delicious actually!

And that's it. To make eggnog pancakes, adjust the spices, change the milk and maybe decrease the sugar. Happy holidays!

Friday, November 15, 2013

Amy's Gluten-Free Flour Blend

When I started my adventure in gluten-free baking, one thing that stressed me out was the amount of flours in a recipe. It was so off-putting, sometimes I did not want to bake. I was soon rescued by a friend, Amy Andrews of Amy's Food Room, who gave me her recipe for a flour blend that she had created. Over the years, I changed it to what you see below. I am very grateful to her for getting me started on the road to successful gluten-free baking.

One of the differentiators of my recipes from others you may see is the concept of using one blend for almost everything. This flour blend can be your new best friend. I mix between 6 and 9 cups at a time (1 to 1.5 times the recipe below). I use it for bread, waffles, pancakes, cupcakes, cookies, etc. with few exceptions. I almost always use it in other people's recipes.

One thing that I noticed with many recipes and pre-mixed flour blends was that these have a lot of “white” flour, for example white rice, potato and tapioca starch. My blend still has more nutritional value with the brown rice and millet; it's 2/3 whole grain. The upside is that it is light enough to create a baked good with excellent texture.

Another distinction from other flour blends is that I do not add xanthan gum to my mix for three reasons. I find that for most cakes, you only need 1/2 teaspoon xanthan gum for every 2 cups of flour but for cookies, you need more like 1 teaspoon for every 2 cups of flour. So it's better to mix according to the recipe. Another reason is that the xanthan gum, which lasts over a year, should be refrigerated. I don't refrigerate my flour mix for reasons of space and finding it is not necessary. Lastly, if I'm only mixing a small amount of xanthan gum with a large amount of flour, I would worry it would not get properly distributed. These are my views. If you are worried about the cost and not using it in a year, find a friend to split the bag. So, this is the secret to my success. I hope it helps.

Mix together and keep in an air tight container:

3 cups brown rice flour
1 cup millet flour(if you can't find or don't want to use millet flour, substitute with brown or white rice flour instead)
1 cup tapioca flour or starch
1 cup potato starch (not flour)

Here's to happy baking. Let me know if you like it.

Tip: When you measure the flour into the large container, it's ok to put in a little more or less of a flour. I have found it's ok to estimate. However, when you measure flour for a recipe, fill the cup with about half of the flour then scoop flour on top, enough so that it is heaping. Use a flat edged knife to level the cup to measure exactly.

The Warm Kitchen gluten-free cookbook is chock full of tips. This is one of about 40!

Tuesday, November 12, 2013

How to Plan and Cook a Holiday Meal


Whether you are planning one or two dishes or a whole meal for the holidays, it’s always nice to have some extra tips. Here is my quick guide to planning and creating a delicious meal that happens to be gluten-free (with dairy and egg-free variations). As I always says, you don’t have to be a chef to be the “family chef”; you just need good recipes and techniques.

Let's start with the basics:

1. Plan your menu
2. Figure out amounts including what you would like to have for leftovers
3. Make your shopping list including what can be purchased before and what has to be purchased the day or so before
4. Create a prep list for the days leading up to the big day
5. Create a prep list for the day of, working backwards from when you want to eat
6. Eat and enjoy your meal!

That’s your high level guide. Now let’s get into the details.

Plan Your Menu
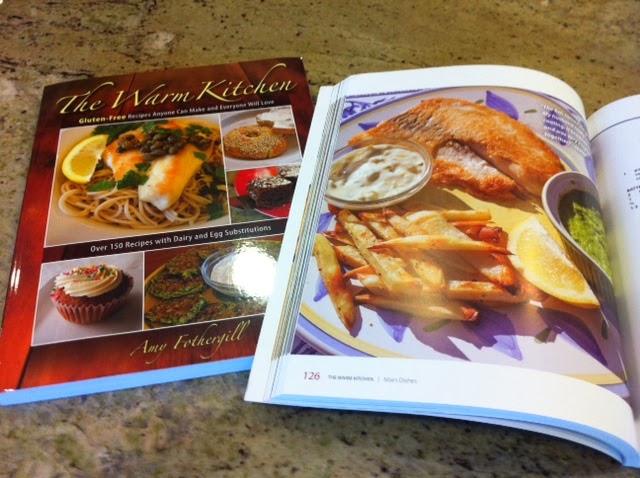
This is a combination of what you are in the mood for, what your family likes, and what you have time to make. Of course many people opt for the traditional minimum such as: turkey, gravy, mashed potatoes, candied sweet potatoes, stuffing, vegetable and/or salad, cranberry sauce, rolls, and pie for dessert. If you eat gluten, dairy, and even egg-free, all of these dishes can be made as good as their regular counterparts. Make sure to have your recipes ready to go. You can find gluten-free and dairy-free recipes perfect for the holidays in The Warm Kitchen cookbook; how convenient!

My suggestion is to start with a basic recipe, especially if you are new to this. Some people prefer the taste of the traditional recipes for the holiday meal; others like to experiment. The best advice is that if you are making a new recipe, test it out first to see how long it takes and make sure you like it.

Your menu drives everything else which includes your shopping and prep lists so it has to be the first step.

Amounts
This is another tricky topic as most people love to have leftovers. Consider this in your planning. Generally for turkey, it’s one pound per person. For the gravy, I usually make 1 cup for 4-6 people (most will use around 1-2 tablespoons but others use more). A tray of stuffing will feed 6-8. For potatoes, I estimate one large russet potato to feed 2-3 people. If you want more, plan accordingly.

Shopping List
Now that you know what you are making and how much of it, start the shopping list. Check to see what is in the pantry first. If I see certain things on sale, I tend to buy extra if it’s not perishable. Sometimes I forget about things like eggs and sugar so make sure to check everything (unless you have neighbors who you can call upon for that cup of almond milk you need).

When you make the shopping list, include what can be purchased ahead like the frozen turkey, vegetable shortening for the pie crust, etc. and what needs to be purchased a few days ahead such as the fresh fruits and vegetables. The bottom line is the shopping list will help you to be able to plan the meal. Having some things in the house beforehand means that when you go to the store for those last few items, you won’t have to fight the crowds as you only will need a few things.

Prep Lists
When I worked in big kitchens, it was all about the prep list; what has to be done today as well as tomorrow. Think about what can be done the day or two before like making the pie crust, toasting the bread for the croutons, making the cranberry sauce, and even chopping the vegetables.  Don’t forget to defrost the turkey 2-3 days before. That should be on the list. I leave mine in the fridge; it is not recommended to leave it out to thaw (unless it’s outside, about 40F, and safe from animals).

For the day of the big event, figure out when you want to eat, leaving an hour for the turkey to cool down a bit and be carved. Work backwards for everything else. Potatoes can be cooked and mashed in the morning and then heated in a pan in the oven. I usually make my gluten-free gravy (here's a recipe from my other blog) from the drippings so that’s always something done in the last hour. The stuffing can also be done ahead. Salads can be prepped but not mixed with dressing unless directed. Most veggies can be cut for the salad except for anything that browns like avocado, pears, and apples.

A prep list is also helpful when someone says to you “what can I do?” You can share the list and go from there. One thing I love to do is cross things off the list. Having someone else help with this is even better.

The Big Day
Remember the holidays are supposed to be a time for us to enjoy our family and friends. If you are stressed out or have made too much, it won’t be fun. If you have to, take a few things off of the menu or ask for more help. Then, get ready to sit back and enjoy yourself!

Here are some other gluten-free recipes you might enjoy:

Beet "Caviar"
Crustless Quiche (see note for gluten-free version)
Roasted Tomatoes over Mascarpone and Polenta
Caesar Salad
Butternut Squash Risotto
Pumpkin Pie (note: the crust is NOT gluten-free; you can use a pre-made gf crust or find a recipe in The Warm Kitchen)
Gluten-Free Brownies

Monday, October 14, 2013

Gluten Free Shortbread Cookies

I adapted this recipe from a regular recipe and I have to say, it's just as good. I do believe my English mother-in-law would approve.

When making these cookies, make sure you use xanthan gum. I taught a cooking class one day and the student forgot the xanthan gum. That cookie looked good and smelled good but when we tried to take them off of the tray, they crumbled. Don't worry; we didn't throw them out. These were still edible but I wouldn't bring them to a party.

Another tip for baking any gluten-free cookie (there are more tips on page 228 in my book, The Warm Kitchen) is to make sure you use either parchment paper or a silicone baking mat. These will stick to a regular baking sheet.

What if you are dairy-free? No problem. I would suggest using Spectrum's organic shortening. It replicates the texture of butter very well. There is also a butter flavor. I do not like the taste of the butter substitute sticks. Simply my opinion.

The recipe has no eggs so if you make it dairy-free, it will also be vegan. Enjoy!!

Gluten-Free Shortbread (page 232 and 233 from The Warm Kitchen)

You will be amazed at how much these taste like regular shortbread. The key is to not overwork the dough. If you don’t have the ingredients for Amy’s blend, other gluten-free flour blends will work but pick one that does not have xanthan gum or else it will throw off the proportions. A Silpat or parchment paper is necessary so that the cookies do not stick.

Makes about 24-30 cookies

2 cups Amy’s Gluten-Free Flour Blend
½ cup white rice flour plus extra for rolling
1 teaspoon xanthan gum
½ teaspoon flaky sea or kosher salt

1 cup unsalted butter, softened, or vegetable shortening (for dairy-free)
½ cup white sugar
1 teaspoon gluten-free vanilla extract

1. Preheat the oven to 325°F.  Prepare 2 baking sheets with parchment paper or silicone baking mats.
2. In a bowl, mix the flours, xanthan gum, and salt together with a whisk. Set aside.
3. In a stand up mixer or with beaters, beat the softened butter or shortening and sugar until it just comes together, being careful not to overmix. Add vanilla and mix briefly.
4. Add the flour and mix until it is combined well. It might look crumbly at first, but keep mixing and it will come together.
5. Place dough on the counter. Use some white rice flour to keep from sticking. Roll into a log. Using a knife or pastry cutter, cut circles approximately 1/2” thick. You may need to pat them to make them more round. Place on baking sheets.
6. Bake for 12-14 minutes, rotating pans once. Cookies should be just golden on the edges.
7. Remove from oven and let rest for 3-5 minutes. Carefully remove from baking sheets, using a spatula, and place on a rack to cool. They can crumble easily but are so good!

Variation: Lemon Shortbread
Add 2 tablespoons of lemon zest to the dough in step 4.

Monday, September 30, 2013

A Book is Born!


I have the pleasure to announce the birth of...my cookbook, The Warm Kitchen! I have two children and I remember how I felt during pregnancy, labor and birth. In the beginning I was enthusiastic but of course, it felt very long and drawn out. When my water broke with my first child, I was so excited (as I felt just at the end when the book was ready to be printed) and then labor hit. Wow, that was hard (as was the process of actually getting it printed and delivered). But then it was over and I had a baby. I was so happy to show him off. And again, there's another similarity. Now that the book has been out for about 2 weeks, I'm glowing. It's still an adjustment (working on signings, demos, interviews, etc) but it's been worth it.

I assume you don't want any more details about the birth of my children, but I thought I would take you through some of the process of the book. People have asked me how long it took; almost 3 years. Initially, I just wanted to write a cookbook. I had met with a designer and we had started (pre-emptively in hindsight) organizing the book and creating a bit of a template. Since I am a cooking instructor, I wanted something that would be a tool for people, not just a group of recipes. I picked up a cookbook once and the first step was "Cook the chicken." All I could think about was, how could you tell someone to just cook the chicken?? There's so much more! Regardless of the subject matter, I knew details would be important.


Me reviewing my cover

Checking colors

The printing press was pretty amazing; that's my son

After getting some good advice from an editor and thinking it through, I decided in early 2011 to switch to a gluten-free cookbook. At this point, I had been cooking gluten-free since 2007, changed my diet in 2009, and changed my son's and husband's in 2010. The more I thought about it, the more it made sense.

Alison (A Girl Defloured) helped me out the day of the printing

My plan had always been to self-publish; I even had a few authors suggest this to me. If the opportunity arose for me to use a publisher, I would. Self-publishing ended up being the best option for me. Although it was hard as it's something I have never done before, I enjoyed the process as it gave me the chance to learn something new. There were things I spent money on that I felt were worth it; a designer to do the layout and get the file ready for the printer, a graphic designer to create a mouth-watering cover, a printing company in the US that would give me a good product at a reasonable price, and a publicist. My husband gave me good advice when it came to the photos (I took most of them myself but he helped in the review process) so I was able to save money that way. Otherwise, honestly, this project would not have happened. There are 264 pages of which probably 250 of them have photos. Some pages have 2-6 photos. So, if you do the math, that's a lot of pictures!


Between raising my kids (always my number one priority), taking photos, writing recipes, having them tested, approving layouts and edits, and much more...well, you can see why it took almost 3 years. So, I'm finally here. It's done. I'm happy. I have been told the book is "gorgeous" and "looks very professional." People love the photos and the recipes. It's all been worth it. Now, I get to show off my new "baby" while the rest of my family also enjoys the accolades. It's super cute to have my children be proud of me and my accomplishments. One of the funniest things they said to me was "we are lucky because mama is going to give us a cookbook. For free!" Yes, children. I will. Thank you for taking the time to read this blog. I truly hope you enjoy the book, whether or not you eat gluten-free.


This is what 1100 books looks like!

Buy The Warm Kitchen from local establishments like Toque Blanche or Omnivore Books.